April 30, 2009

Braids, braids and more braids...

The most common way Makenzie wears her hair is braids of some sort. For me they are quick and easy and keep her hair somewhat neat. The awesome thing about braids (especially french or dutch braids) is once you get the hang of it the hair doesn't really need to be that long and it can be done in almost anyones hair.
So today we have random braided hair dos :)
#1: Meet A:
Meet A's First Braid:
#2: Meet K:Meet K With Both a Single French Braid, and then A Double French Braid into a low pony:

#3: Meet Younger Kenz:Kenz with 6 Simple Braids (3 on each side):Kenz with 4 Simple Braids (2 on each side):


Knotted Triple Braids

This is really easy for something different. First I started with three knots in the top of her head (details to come tomorrow!) and then I used the tails from the knots to start a french braid down the middle of her head, I rough parts all ended at the centre of her neck. Then I french braided the sides and flipped them up securing them to the centre braid with a clip. This takes only a couple minutes to do :) But I'm not too much of a perfectionist so the braids are a little messy, the parts are estimated :)


April 28, 2009

Headband Braids... Multiple Uses

Headband braids are simply french or dutch (I really can't dutch braid) braids across the head to look like a headband. Since Makenzie has such a strong natural part and many layers in her hair we usually part up the middle and do two braids, one down each side of the part. I love this style because it can be the base for so many other styles so once you learn how to do this one you can do pretty much anything.
In this first picture we have simply done the french braids to the ears continuing in regular braids and attaching them at the bottom of her head under her hair. We left the rest of the hair down and that way we could see the beautiful hair down, but it was still kept away from her face by the headband.

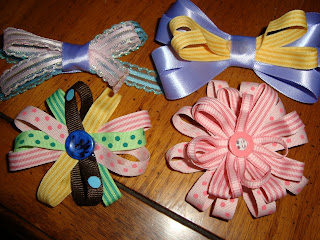
The next couple pictures are all the same style on different days. Headband braids into two ponies. Cute and simple, but different. This is one of our favourites. Finish them off with cute bows, ribbons or funky colours and you're good for the whole day :)

This next one is always cute too: Braided headband style (2 braids) to the ears and then finished off as regular braids and attached at the back of the head (over the hair) with an elastic and finished off with a bow :)
Here's an example of a single braided headband. It isn't the greatest because for some reason her hair just doesn't like the single one. But it serves the purpose :)

Once you can braid you can do so many styles! Use your imagination and see what you can come up with!
**EDIT**
I found some better pictures of a single braided headband although in these ones I divided the headband section into two parts. The very front I left out and once I had braided the second part I attached the left out part under her hair to form the headband. I got the idea from the blog "A Princess and Her Hair" (See links at left!) and it worked really well.


April 27, 2009

How To: Make a Hairbow:

Girls at OYP, this is for you :)
Pick your ribbon and cut even sized pieces 4-6 is usually a good number :


Find the centre and stick the needle through:


IT will look like this:


Then fold over (start at bottom ribbon and put through needle:


So it looks like this: YOu can either leave it or bunch it together (see next photo)!

If you're doing another layer now is the time:


Use a small piece and glue it over the centre:

Now take a bobby pin (my preference, pretty much any type of clip will work and glue a ribbon to the part that will attach to the bow)


Glue the whole thing to the bow like so:


Ta Da! Use this method as the base for many other styles of bows :)
If you need further clarification on any step just let me know!


April 26, 2009

The Day After Braids

So she seems to like the poof that is her hair following a day in braids, so here' s a super easy way to keep it somewhat controlled but still semi-down so she can enjoy the poof.
This do is also easy to modify! Just section off the hair in front and starting at the sections by her ears put into an elastic. do the same with the next section adding the hair from the first section. When you get to the middle, just pull it all together into a half pony.


Simplicity

Sometimes we're going out first thing in the morning and with getting 4 kids ready to but wanting her hair still looking cute we go with something a little more classic. Still quick to do, but always cute we have two simple french braids together at the end.


April 24, 2009

Criss Cross Frenchies

This is one of my favourite fairly quick do's for everyday wear. It is alot simpler to do than it looks providing you can already french braid and it is a little bit different but not different enough to look odd.
Start by sectioning the hair into four and then clip 2 diagonal sections out of the way. Start braiding the top loose section diagonally going right down into the opposite bottom loose hair. over the centre there may not be enough hair to continue french braiding so just regular braid until you can pick up hair again.
Once you are done that side secure in an elastic and do the same with the opposite side of the head. you can either attach the braids at the bottom, stop braiding at the neck, or braid all the way down and leave them. I've shown two different finishes here. We also used these colorful braided pieces (6 for $1 at dollarama) to make it a little funky!
Back View:
Front View:
This is a closeup, it was a different day and the braids weren't as good as normal (she was really fidgety!) And we finished with cute bows instead of the colored braids, The braids also came together at the bottom.


Princess Hair Crown

So for those of you who have a little princess, I came across this hairstyle somewhere... I'm not quite sure where... but anyways, I came across it and since my little girl is always a princess we decided to give it a try. It turned out really well.
Since Kenz has a very strong centre part we try to work with it rather than against it so we began at the centre part and french braided taking hair from only one side rather than both, in a circle down to the bottom centre. I kept the hair in the centre clipped seperately and braided both sides the same... kinda confusing description but you get the idea. Then we just took the ends and included them in a messy bun in the middle with the rest of her hair. Top it off with a big ribbon and voila! A Princess Crown Headband!


Related Posts Plugin for WordPress, Blogger...