May 25, 2009

Multiple Braids to Bun with Bangs Pulled Back

Since it's summer time now and we've decided we want to grow out Kenz's bangs we're going to probably be doing a lot of similar styles to this one with her bangs pulled right back off her face.
To start this style I pulled her bangs off her face by doing two rows of elastic braids. Then I regular braided the ends of the elastic braids together. Next I took all of the hair around her head and did 6 more regular braids.

Next I pulled all of the braids back into a pony tail and took out the elastics from the ends of the braids and then made it into a sortof bun. I was going to do a ballerina bun but got impatient and just did a half a messy bun.
Isn't it pretty like a flower or star?!



May 21, 2009

Elastic Braids to Messy Bun

This one is great for getting bangs off of her face and for warm or windy days where the hair needs to be pulled back.
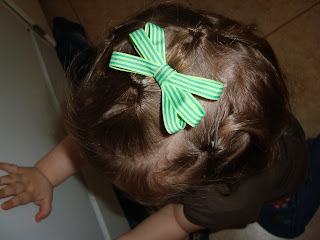
Start by sectioning front/back and then section the front into rows. Make the rows into squares starting at the front and do a tiny pony. Take the hair from the first section and add it to the second section. Keep going until the hair is used up. Try to keep the parts even as you do each section.This is what it will look like with all the rows finished:Add all of the hair into a pony in back and make it a messy bun. Add in a pretty bow (I told you the bow I made yesterday would look great with this outfit!) and you are done!


May 20, 2009

Two Messy Bun variations:

Sometimes I'm looking for a good and sturdy - windy outside - 3 year old wants to play rough - hair do. I love doing a messy bun variation for this because it holds up really well to wind and play and you don't have to worry if it does come out a little. The first 3 pictures are one style and were taken after a full day of playing outside:

For this style what I did was four knots in the top half of the hair. The back half of hair was divided into two ponies and then the top two knots were added into the ponies. Next I braided the bottom two knots and added them into the ponies with a new elastic. Then I took yet another elastic and only did a half a pull through and pinned down the bun randomly to create the messy bun. This style only takes a couple minutes to do, I think choosing her ribbons took longer than actually doing the style.
This is style # 2 and I think it's a little prettier for when we are going out and I know she will be playing but I want her to look just that little bit nicer.

The first thing I did for this was divide the top and bottom sections of hair. The bottom I put into two ponies and the top I divided into 4 sections. One at a time I took the right two sections of hair that was left out and added it to the right pony twisting it before securing with an elastic. Then I did the same to the left side. I created my messy bun look the same way as above with the half pull through and pins.
Again, these pics were taken at the end of the day and it's still looking pretty good considering the wind we've been having lately.


New Bows!

Yay! I finally had a few minutes tonight to try out some of my new ribbon that I have been sporadically buying lately and thought I should share some of the results. I was in a fairly simple mood tonight so nothing too fancy but I think they all turned out pretty good:
My favourites this time I think are the pink and green polka dots :) Although the black and white single one will look great with her red outfit tomorrow!


May 13, 2009

Double Criss-Cross

So I know I did the single version of this not long ago, but I really like the way this turned out doing it doubled up.
Top View:
Bottom Underneath View:
Side Upper View:
Side View:


May 09, 2009

Woven Braids

So I was browsing other hair blogs this morning looking for something I've never tried before to do in Kenzie's hair for Mother's Day. Here is what we came up with, originally found at http://girlydohairstyles.blogspot.com/2009/03/x-marks-spot.html . I really like the way this turned out on Kenz but I think if I were to do it again I would definitely use a smaller darker coloured ribbon so that it isn't quite so eye catching... this one would be better a little more subtle.
A brief description: 5 French Braids, woven together with 4 Pieces of ribbon and then flipped up at the bottom.


May 05, 2009

Shortie Topsy

Who remembers the topsy tails that were on the infomercials back in the 80s/90s... I do! I used to have a home made one (thanks dad!) and not too long ago I wanted to achieve the same type of tool so I used a piece of pipe cleaner and some electrical tape and made my own. I did this because topsy-tails are a cute look for little girls with short hair, or long hair, good for keeping shorter pieces tight etc...
Too demonstrate just how cute they are with short hair: Miss A. has 4 tiny little topsy tailed ponies on top of her head (3 across the front, 1 across the back), topped off with a cute bow:
Here, Miss Kenz had 4 tiny topsy tails going across the front of her head into two upside down topsy tail ponies:


May 04, 2009

Double Twisty

This is a fairly simple way to look complicated. It's also alot easier than braiding for alot of people to do.
Since we're doing two of these twisties, part the hair down the middle (side part would work too!) and take a section from the top of one side.

Secure the section with an elastic (it keeps the twists tighter), and start twisting the hair.

Using your preferred method (comb or hand) take another small section of hair and add it into your twisty and continue to twist some more.


Do this all the way down until it looks like this:

Twist until the very bottom and secure it with bobby pins twisting back up so that it's off the neck. I use two bobby pins per side to secure (4 total). Here is what both completed sides look like:
And your done, if you desire you can add some flowers or bows, but I kinda like this one as it is.
View from the side:


Knots

So normally hair + knots is a no-no. Sometimes however they can be helpful in keeping shorter hairs in a ponytail or other hairstyle. In case you are wondering, here is step by step on how I do my knots.
Take two strands of hair and tie once, then tie a second time and secure with a clear elastic. Easy Peazy!


Hair Accessories

What's a simple way to make a basic hairstyle look different and unique? Add accessories to it! Accessories and fun and funky and great for any girls' hair... not only that but they are incredibly easy to make at home. Making hairbows, headbands and other accessories is also a great bonding time between mom and daughter. While I make all of Kenz's bows, she sits and helps pick out which ribbon to use, which centre piece. Sometimes she helps me glue (she's only 3!). Here are some of our home made collection:
Coming Soon: More tutorials on how to make your own bows, headbands, and flowers :)

If you aren't crafty you can always contact me and I can make you a custom bow (or set) for minimal cost + shipping.


What's a great way to deal with after-braid frizz? Do a low pony-bun (don't pull the pony all the way through) and slap on a great big flower clip, voila! Fancy Shmancy!


Coming later today: Knots


Related Posts Plugin for WordPress, Blogger...